WhiteBlaze Pages 2024
A Complete Appalachian Trail Guidebook.
AVAILABLE NOW. $4 for interactive PDF(smartphone version)
Read more here WhiteBlaze Pages Store

Results 1 to 11 of 11
  1. #1

    Default Tarp Setup sugestions

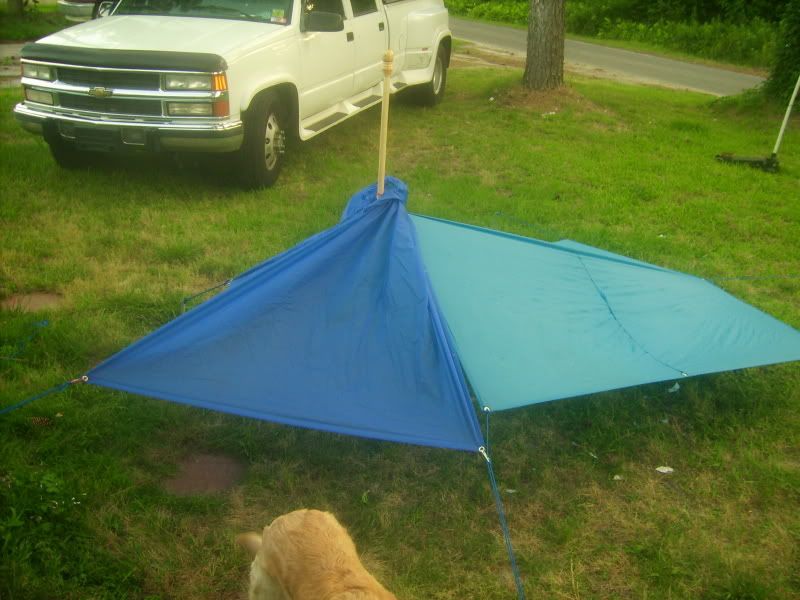
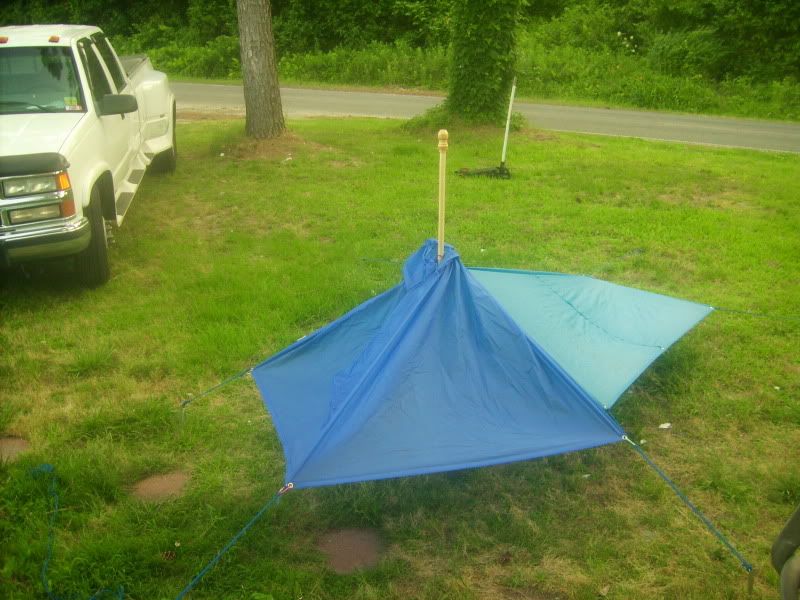
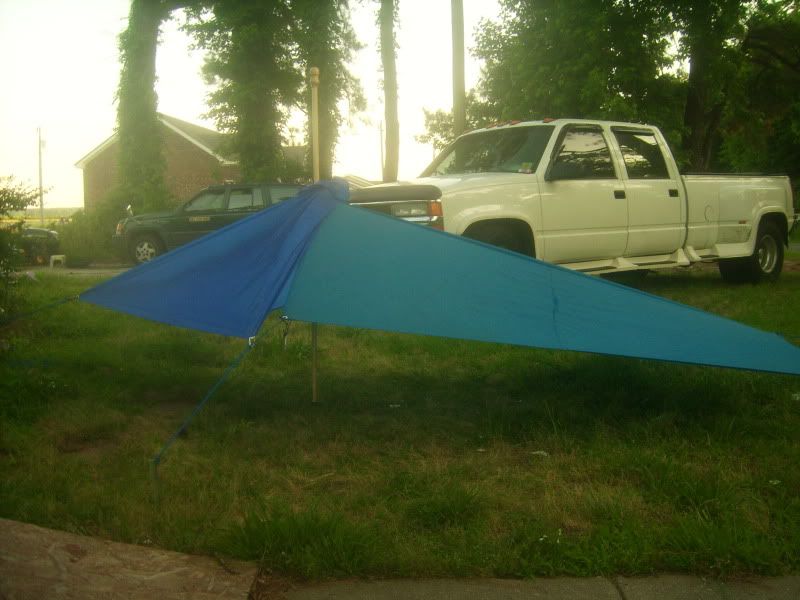
    I got bored and thought I would set up my tarp before next months Hike. I have a better one in the works, but it will not be ready before my next section.


    The pole is my walking stick, and is attached by my homemade stickcam. The stakes are hand made from aluminum angle stock, each is 12 inches
    The front section is just my poncho

  2. #2

    Default

    BTW I was looking for suggestions on how to make this setup better with little work and quickly.

  3. #3
    Registered User
    Join Date
    04-23-2006
    Location
    Austin, Texas
    Posts
    365

    Default

    First off, you might want to add 2 more stakes to take the back edge of the poncho over the front edge of the tarp. With the size and shape tarp you seem to be using, your options are limited. That should not be a problem, however.

  4. #4

    Default

    2 more where? I have 6 now 1 in each corner and one front middle and 1 back middle.

  5. #5
    Registered User
    Join Date
    09-08-2007
    Location
    Lebanon, Virginia
    Age
    49
    Posts
    31
    Images
    1

    Default

    Looks like a pretty good setup!

  6. #6

    Default

    Thanks!! It's a good thing I am short though it is 6 foot from pole to end lol.

  7. #7
    Getting out as much as I can..which is never enough. :) Mags's Avatar
    Join Date
    03-15-2004
    Location
    Colorado Plateau
    Age
    49
    Posts
    11,002

    Default

    Best tarp setup page IMO:

    http://hikinghq.net/gear/tarp.html
    Paul "Mags" Magnanti
    http://pmags.com
    Twitter: @pmagsco
    Facebook: pmagsblog

    The true harvest of my life is intangible...a little stardust caught,a portion of the rainbow I have clutched -Thoreau

  8. #8
    Registered User Wrangler88's Avatar
    Join Date
    09-29-2008
    Location
    Denton, Texas
    Age
    35
    Posts
    270
    Images
    2

    Default

    Quote Originally Posted by Mags View Post
    Best tarp setup page IMO:

    http://hikinghq.net/gear/tarp.html


    Good call. This was pretty helpfull.

  9. #9

  10. #10
    Some days, it's not worth chewing through the restraints.
    Join Date
    12-13-2004
    Location
    Central Vermont
    Age
    68
    Posts
    2,664

    Default

    Question: looks like a pretty compact setup - have you spent a cold, miserable, rainy night or two under there? It's great to save weight and all, but the real test of any setup is those crappy nights. Are you comfy & dry, or would a few more ounces for a bigger tarp make a world of difference?

    I have a big Speer tarp, about 10' x 12' as I recall, 20 ounces with guy lines. whether I sleep under it on the ground or in a hammock, loads of protected space under there to live comfortably. YMMV

  11. #11
    Registered User
    Join Date
    12-12-2007
    Location
    ARNOLD, MISSOURI
    Age
    86
    Posts
    59

    Default

    I have posted on the Tarp thread by “Summit” some stuff on my favorite lightweight tarp. The 9x9 Noah tarp is lightweight not ultralight but it is about as bombproof as it gets. I thought this would be a good place to talk about what I learned from “Doc” on how to pitch this catenary cut tarp.

    In 2000, “Doc” on www.backpacking.net ran a series in Shelter Reviews on how to set up and accessorize the 9x9 Noah and do it right. Everything works out of the diamond fly pitch. This is the easiest and fastest pitch and gives you a great deal of headroom and visibility and about 35/40 sq. ft of sleeping/living space and about 20 more for gear storage.

    Following Doc’s advice, I like to rig the high end downwind and about 5 to 6 feet high using my hiking staff or a tree. I use a stick about 2 feet long to prop up the low end of the tarp off my feet.

    Doc recommends two solutions for nasty weather.

    One: Lower the high end a little and tie the “door” partially closed with the top loops that are about 1/3 down from the top. You can go down to about 4 feet if things get really bad and restake the sides to reduce the catenary side gaps and stake the bottom door ties to the ground to really button things up. You lose a lot of headroom, but you should be snug and dry. Any remaining gaps and rain trickles should be over your floorless side storage and front door cooking areas.

    Two: Use a storm door poncho to seal things up. This is what I like to do as I usually carry a poncho anyway and I can keep all that nice headroom. Simply face your door with your poncho help out horizontally. Center on your tarp peak and inside the guy ropes wrap the poncho around and over the peak. Snap together the top edge of the poncho along the ridgeline. Use light bungees to run both bottom poncho corners to your side stakes. Unhook either bungee to enter or exit. Those small triangular openings at these corners help with ventilation and any rain spray will fall on the side storage areas.

    If the wind is really bad you can tie the sides of your poncho to those before mentioned top loops. Also if the wind shifts and the top of your poncho over the ridgeline wants to balloon, run a line from it to the foot of the tarp. You can also tie off the top grommet of your poncho door to the pole top if it wants to slide down. Most of the time you won’t need these extra steps, but if you think you might, it is really nice to batten down the hatches beforehand.

    Three more tips. The foot end of your tarp shelter narrows down pretty fast, so don’t crowd it. Keep the lower part of your ground cloth/sleeping area well within the drip line. And if you pitch the tarp upside down you have 3 interior loops for bug nets, drying lines or whatever. Three stakes and a good tree or four stakes and a hiking staff will get your tarp up. But double guy lines on the hiking staff and staking the remaining side tabs will really nail things down tight.


++ New Posts ++

Posting Permissions

  • You may not post new threads
  • You may not post replies
  • You may not post attachments
  • You may not edit your posts
  •